• Skip to content
  • Skip to primary sidebar
  • Skip to footer

cooking for elephants

Header Right

  • Deutsch
  • English
  • Home
  • About me
  • Recipes
  • Contact

Salty things

Bengali Tomato Jam

11/09/2018

Bengali Tomato Jam with Panch PhoranIn West Bengal (the eastern Indian state where my husband is from) lunch is not something thrown together spontaneously, it has a particular order and choreography of dishes and flavours, always centered around a big plate of rice.

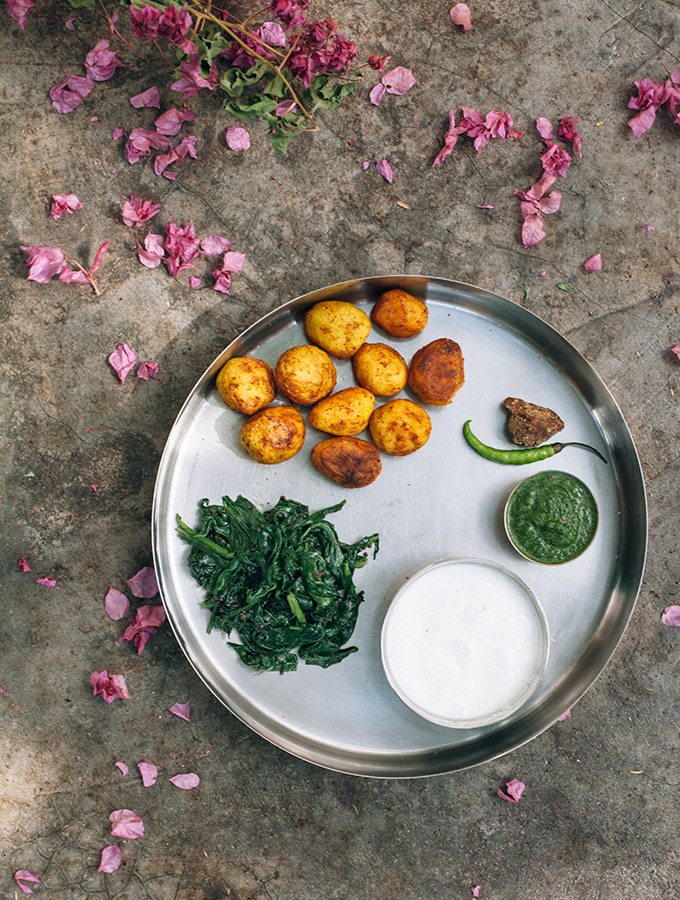
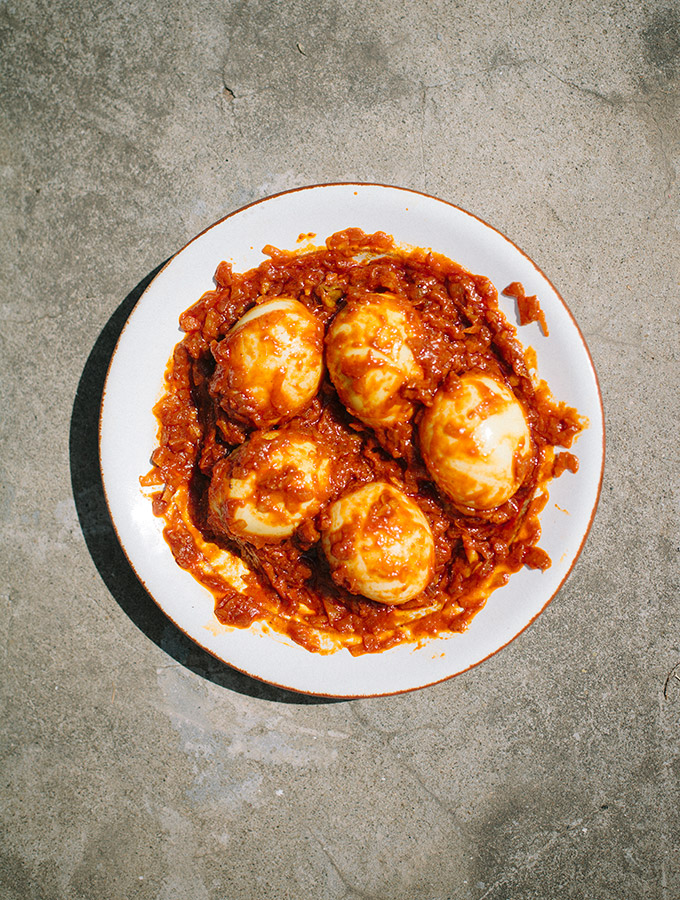
There is no Bengali meal which consists only of a single dish, there is always a variety of dishes served, although the amount of dishes cooked is getting less with each generation. One of the most unique features is that the different dishes are never eaten together. Each is served in it’s own right, so that the subtle flavours of Bengali cooking don’t get mixed up. My mother-in-law always eats last as she is so busy handing us one dish after the other (this always annoys the feminist in me, but I think she really doesn’t mind).

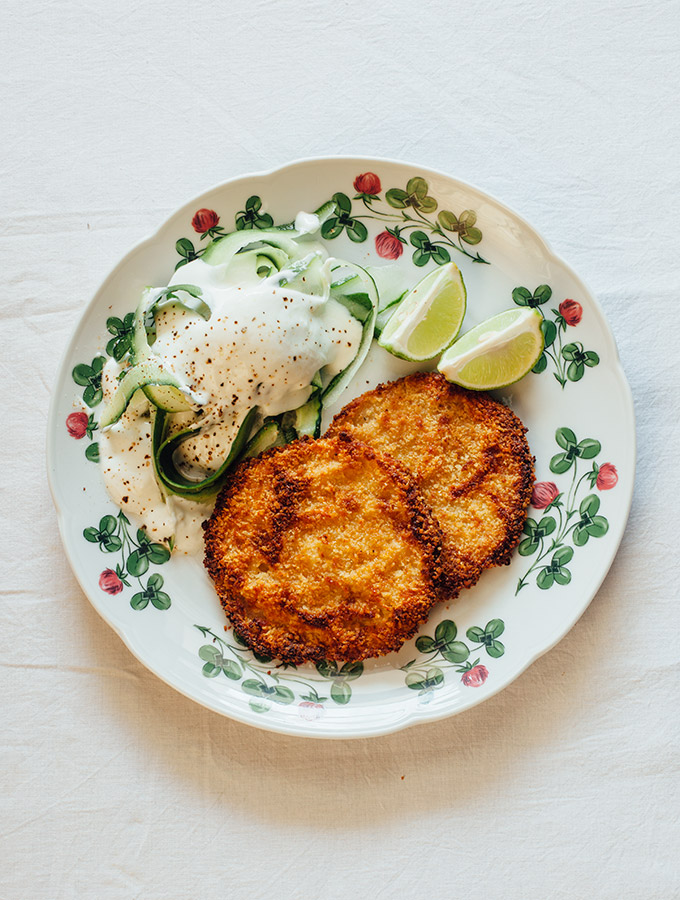
A traditional meal should always start with something bitter to increase your appetite and activate your digestive system (mostly in the form of bitter melon or neem leaves). After that you have something fried,  dal, one or several vegetable dishes and then comes the fish or meat. The finishing touch of the meal is always something sweet. Although in West Bengal this doesn’t mean dessert but mostly a dollop of sweet spicy chutney which you gracefully lick with your fingers from the plate (there could also be yogurt or mishti doi with it). After that you are full, happy and if it’s a weekend you retreat to a good afternoon nap.

Panch Phoran Bengali Five SpiceAlthough the traditions are fading, the clear order of flavours and dishes is an important (and beautiful) concept of Bengali cooking and a strong distinction to other Indian cuisines.

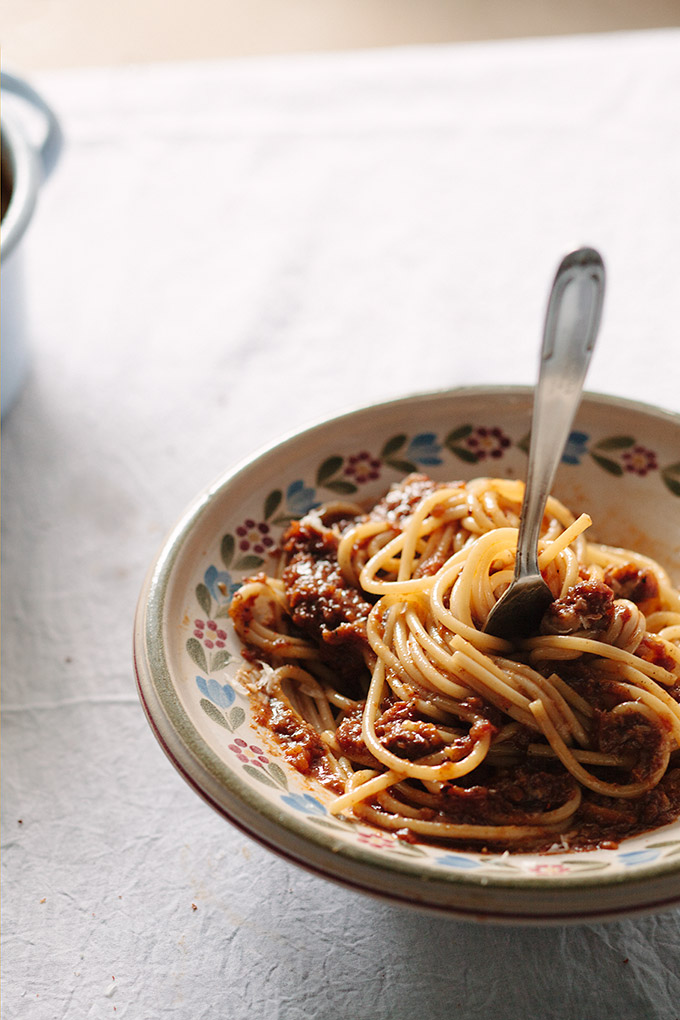
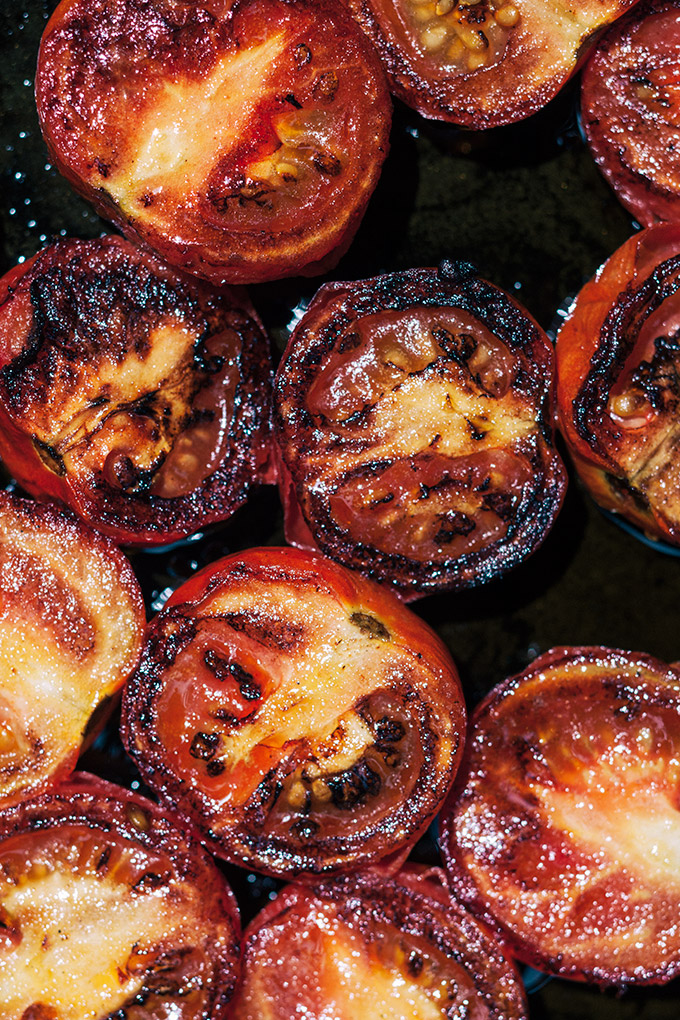
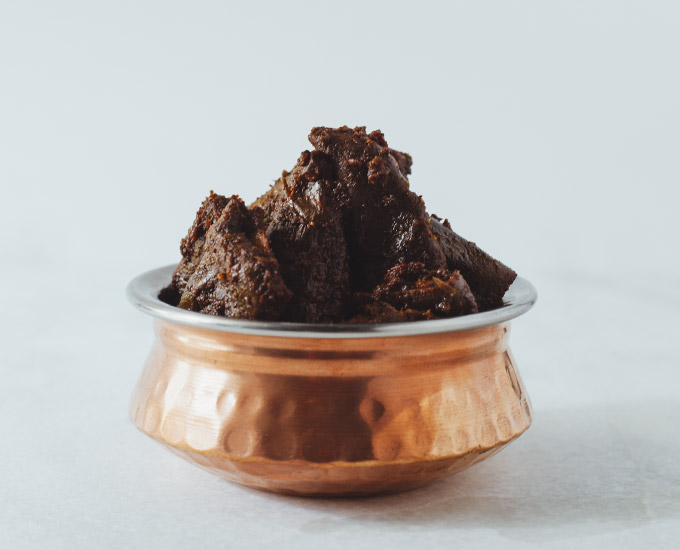
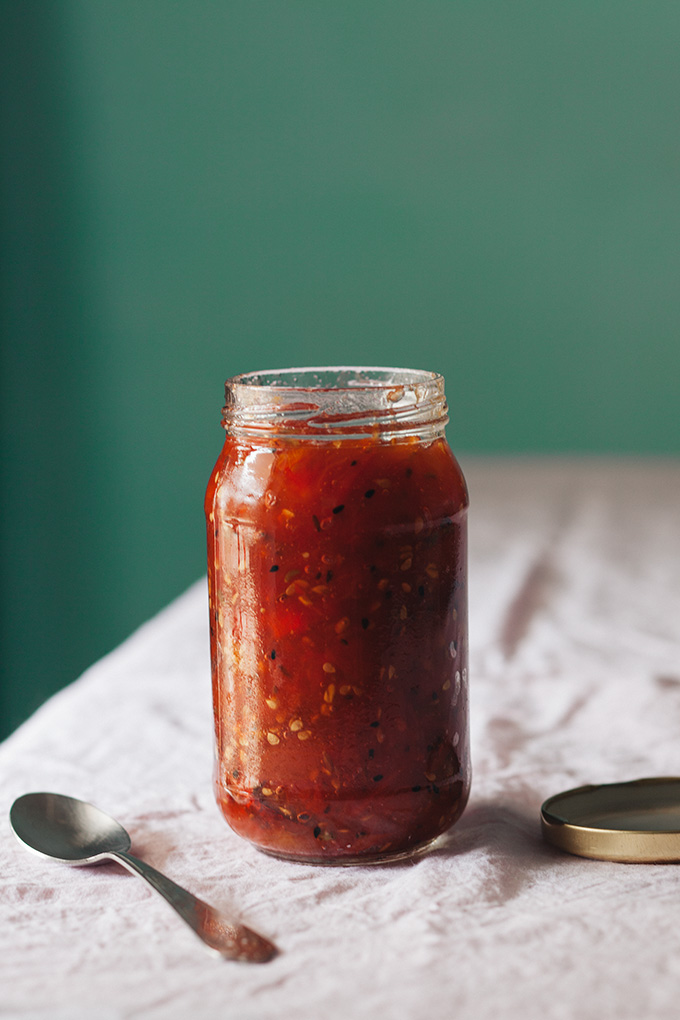
My mother-in-laws favorite part of the meal is always the spicy sweet chutney and the recipe which follows is based upon her tomato chutney recipe. Traditionally it is cooked with dates and a bit loose. I personally prefer to make a tomato jam out of it as it keeps longer and the firmer texture offers more applications. We also eat it in sandwiches, as a dip or with some cheese. It is sweet, has a bit of heat from the chili and is spiced with Panch Phoran, the sensational Bengali five spice mix.

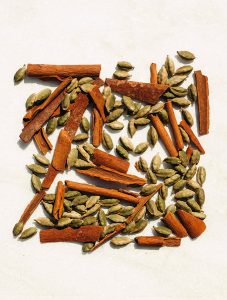
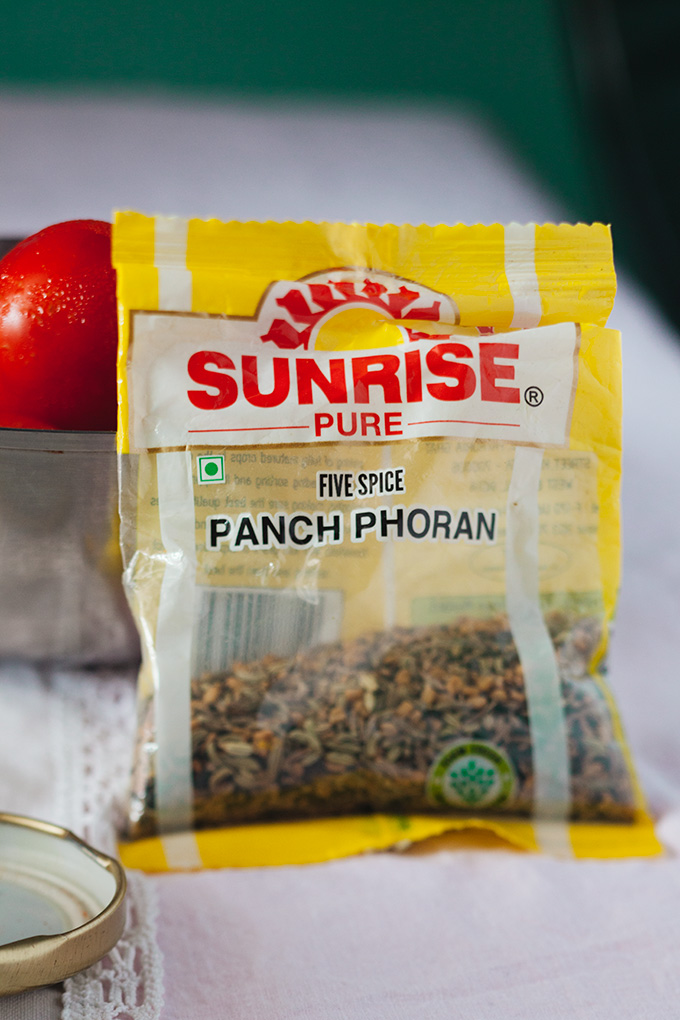
Panch Phoran is a blend of 5 whole spices and depending on which seed you bite on you’ll get a bit of a different flavour. It’s an exciting spice and absolutely worth buying. It should be available in most Asian stores and online. And don’t worry it’s not a one-trick pony and can be used in many dishes, I’ll keep posting recipes with it.

1 vote

Print

Bengali Tomato Jam

For 3 - 4 glasses.

Ingredients

1,5 kg tomatoes

600 gram sugar

8 gram pectin

1 teaspoon salt

3 teaspoons grated ginger

1 tablespoon chili powder

2 tablespoon Panch Phoran

60 ml apple cider vinegar or lemon juice

Instructions

Wash the tomatoes and cut them roughly. Mix the sugar with the pectin.

Add the tomatoes, salt and sugar to a big pot. Simmer over medium heat for 15 - 20 minutes.

Meanwhile heat a little pan and roast the panch phoran till the spices smell aromatic (use your nose, you will understand when they are ready). Take the spices immediately out of the pan, so they don't burn.

Add the roasted panch phoran, chili, ginger and vinegar to the tomatoes. Taste the jam once and check if the amount of vinegar and chili feels right. Eventually add a bit more. Bring the mixture to a rapid boil and continue boiling for 5 minutes. Fill it into sterilized jars, close and turn upside down while still hot.

Notes

Different pectin brands might work differently, check the label for amounts. Toamtoes are naturally high in pectin and a small amount will do.


Filed Under: Salty things, Sweet things, Spices

Smoky Cinnamon Tomato Sauce

20/08/2018

Tomatoes are everywhere on my social media feed at the moment and people praise their heavenly, late summer aroma. I have to admit though that I rarely have eaten really good, flavourful tomatoes. The german standard tomato simply isn’t as good as it’s Italian or Spanish relatives. Also tomatoes in India are only average and not even our homegrown tomatoes are anywhere near to what I ate on holidays in Italy.

Pasta with Smoky Cinnamon Tomato SauceBut I actually don’t mind, as even the standard tomato has a lot to offer. One of the reasons why tomatoes are such popular fruits is probably because they are natural umami providers as they contain high levels of glutamic acid. Indian cooking embraces this quality and many dishes contain tomatoes in their base gravy, where they provide acidity, volume and savouriness without the taste of tomato.

Charred TomatoesMy recipe for tomato sauce takes a similar approach. With a very unique technique it magically transforms average tomatoes into an unbelievable hearty sauce which reminds me almost of eating goulash (which I think is a very desirable result).

It tastes fantastic with noodles but can also be used as a base for other dishes. The cinnamon might seem a bit out of place, but it  is a really good flavour combination which my grandmother taught me many years ago. In India cinnamon is actually only used in salty dishes..

You’ll need a big heavy bottomed pan or pot for this recipe. I use a cast iron pan with 28 cm diameter and high edges.

Print

Smoky Cinnamon Tomato Sauce

For 2 - 3 people.

Ingredients

  • 9 - 10 tomatoes
  • 2 tablespoons ghee or oil
  • 1 onion
  • 1 cup red wine
  • salt, per taste
  • 1 teaspoon sugar
  • 1,5 teaspoons ground cinnamon

Instructions

Cut the tomatoes into half and the onion into rough pieces. Heat the ghee/oil in the pan on medium high heat. Once it’s nicely hot lay the tomatoes in the pan with the cut side down.

Best to do that with a cooking spoon or something similar as the oil will splutter. Only add as many tomato halves as there is space, they should not lay to tight or overlap. In my pan fit ca. 9 tomatoes/18 halves.

Wait till the tomatoes have nicely browned with a few black spots. Don’t stir or move them around as this will release water and stop them from browning. Depending on your pan and heat source it will take around 5 - 10 Minutes. Half way through add the onion pieces and brown them as well.

Deglaze the tomatoes with the cup of wine and add another 1-2 cups of water. Reduce the heat and simmer the tomatoes for around 10 minutes. Add sugar, salt and cinnamon and roughly puree the sauce in a blender or with a handheld mixer.

Filed Under: Salty things, Spices

Raw Pumpkin Salad with Tamarind Chutney

01/08/2018

I love pumpkin and as it’s a typical summer vegetable in India, we eat all kind of pumpkin dishes already since months. From an Ayurvedic point of view pumpkin belongs to the vegetables which cool the body and are an ideal food for summer. To cool down further in the Indian heat we often keep the stove off and I prepare the pumpkin raw as a salad.

Raw Pumpkin Salad with Tamarind ChutneyTo eat pumpkin raw as a salad is not so well known, but actually most pumpkins can be eaten raw and they have a wonderful mild, nutty flavour and are pleasantly crunchy. Some decorative pumpkins can’t be eaten raw, but you can use any common pumpkin or squash which is meant for eating. Raw pumpkin salad tastes best with a sweetish, creamy dressing and for my salad I borrowed the flavours from an Indian chaat. These are fantastic, north Indian snacks, which can come in wide variety of ingredients. They all are a wild combination of flavours and textures and taste salty, sweet, sour, crunchy and creamy, all at the same time.

Most chaats use some deep-fried item as the base, but the flavours also tastes great with crunchy pumpkin. The salad is done really fast and it’s the perfect healthy snack, which fills you up without being heavy.

Only the tamarind date chutney takes a little time. But once ready it’ll last for months in the fridge and also makes for a fantastic dip, ketchup replacement and can be used in many more recipes. Tamarind is a very versatile ingredient and injects a deep sour-savoury flavour in many dishes (Ottolenghi called it once one of his secret weapons). It’s really, really worth buying! I’ll be posting some more tamarind recipes in future to show you what it can do.

You’ll get tamarind paste in any Asian market or online and it’ll also last for ages and can be used for many more Indian/Asian/Freestyle dishes.

Print

Raw Pumpkin Salad with Tamarind Date Chutney

Enough as a snack for 2 people. The recipe for the tamarind chutney will yield one big jar and last for up to 3 months in the fridge.

Ingredients

Tamarind Date Chutney

  • 200 gram dates without stones, cut in small pieces
  • 5 tablespoons tamarind paste or 100 gram dried tamarind
  • 1/2 teaspoon cumin seeds
  • 1 teaspoons salt
  • 1/4 TL teaspoon chili powder (optional)
  • 500 ml water

Salad

  • 1/4 of a medium sized pumpkin (hokkaido, muscat, etc)
  • 1 teaspoon lemon juice
  • one handfull fresh coriander leaves
  • one handfull boiled chickpeas
  • one handfull roasted peanuts (salted or unsalted)
  • 1 green chili, finely chopped (optional)
  • 250 gram yogurt
  • 1/2 teaspoon salt
  • 2 tablespoons tamarind chutney

Instructions

Chutney

If you use the dried tamarind you first have to make your own tamarind paste. Pour 1 big cup of boiling hot water of the dried tamarind and let it soak for 30 min. You can stir it from time to time to loosen it up a bit. After 30 min add the tamarind and water to a sieve and by pressing on it try to extract as much pulp as possible.

Quickly dry roast the cumin seeds in pot over medium heat till they change colour and smell aromatic. Then add 500 ml water and chopped dates. Bring it to a boil and let it simmer for about 5 minutes. The dates should dissolve in the water, depending on how dry your dates were when you started, it’ll might take a little bit longer. Pour the dates and water into a blender (or use a handheld blender) and puree it, strain through a sieve. Add the puree back to the pot.

Now add the salt, chili powder and tamarind paste (or the extracted pulp), bring to a boil and simmer till it has a thick pouring consistency (a bit thinner than ketchup). Fill in a sterilized glass jar.

As tamarind pastes vary in sourness you should taste the chutney. If it feels too sour add some brown sugar to it, till you feel it tastes balanced.

Salad

Peel and deseed the pumpkin, then grate it as rough as possible. I use a mandoline for it, but if a box grate is all you have you can use that too (it won’t be as crunchy though). Mix the grated pumkin with the lemon juice and green chili (if using), distribute on 2 plates and scatter the chickpeas, peanuts and coriander leaves over it.

Stir the salt into the yogurt, if the yogurt is very thick you can thin it out with a teaspoon full of water. Spoon the yogurt over the pumkin salad and top each plate with a generous tablespoon of tamrind chutney.

Notes

You can also add other ingredients to the salad. A handful of pomegranate seeds or some cubed potatoes or cucumber taste nice. If you are brave enough you can also crush some potato chips and add them on top.

Filed Under: Salty things, Spices

Rita’s Aubergines in Yogurt

31/07/2018

I learned this recipe from Rita, a young woman who worked for a family in our neighbourhood. Rita is from a small village in Odisha, one of the poorer states of India where over-population, deforestation, missing monsoons and the resulting meager harvests often force people to migrate to other parts of India.

auberginen in joghurtSuch was the fate of Rita’s family. Her brother had already left the village and when they got an offer for Rita to work as a nanny in another town, they readily agreed. And so she started working in our town, 2000 km away from her home. Our son played often with the girl Rita took care of and we met them almost daily at the playground. We often chatted with her and all seemed well. Till one day we got to know her real story – she got regularly beaten by her employer, wasn’t allowed contact with her own family and on top of everything she had never seen any salary. We were shocked. We never expected something like that to happen in our neighborhood. Rita had silently endured for a very long time, but after 3 years she gathered all her courage and asked us and other people in the neighborhood for help. And she was lucky, she found people who could help her and bring her back to her village.

Before her journey home she spent a few days in our house and during that time she taught me this aubergine dish, which her mother likes to cook. The aubergines are fantastic – mildly spiced in sweetish yogurt, sprinkled with mustard seeds and curry leaves. But it’s difficult to find a bridge from Rita’s story to the recipe. I actually was not even sure if I should write about her at all. To write about abuse and exploitation on a food blog somehow felt awkward and inappropriate. But then I wondered why ?

A study from 2016 implies that 46 million people today live in slavery, many of them work in agriculture. Whenever we eat a piece of chocolate or a tomato, it’s actually possible someone like Rita has toiled away for it without being paid an appropriate salary. The world of food production is a much sadder place than we would want it to be and maybe we should wonder why there are only so few food bloggers who write about it. Yes, you can read about it in the newspapers and admittedly they write much better than I do. But if we already write so much about food, shouldn’t we at least sometimes write about the darker sides too ?

Rita has a telephone now. She calls us from time to time and sends pictures on WhatsApp. In one of those pictures she wears a yellow sari and beams from ear to ear. She looks like a normal, young woman who likes to dress up and is excited about a new sari. It should have never been different.

Here is Rita’s recipe, in her family they eat it together with a simple vegetable pulao, but it also tastes wonderful with some flat bread or just as it is.

auberginen in joghurt
Print

Aubergines in Yogurt

For 2 - 3 people.

Ingredients

  • 1 big or 3 small aubergines (ca. 10 cm)
  • 1/2 teaspoon salt
  • 1/2 teaspoon turmeric powder
  • 1/2 teaspoon cumin powder
  • 1/8 teaspoon chili powder
  • oil for frying (I use mustard oil, but you can use any neutral flavored oil)

Yogurt:

  • 500 gram yogurt
  • 1 teaspoon sugar
  • 1/2 teaspoon salt 
  • 1 tablespoon water
  • 1 tomato, in small cubes

Tarka:

  • 1/3 teaspoon black mustard seeds
  • 12 fresh curry leaves
  • 1 dried, red chili 
  • 1 tablespoons oil (mustard or a neutral flavored oil)

Instructions

Wash and dry the aubergines, then cut them according to their seize either in half or quarters. Mix the salt, turmeric, cumin and chilli powder and rub this mixture onto the aubergine pieces.

Heat a good amount of oil (at least 0.5cm) in a heavy bottomed pan till it’s almost smoking. Fry the aubergines nicely from all sides, then reduce the heat and continue to cook them till they are soft. Set them aside.

Mix the yogurt with the salt, sugar and tablespoon of water. It should taste slightly sweet and be the consistency of a thick milkshake. Pour the yogurt in a shallow bowl and distribute the aubergines on top.

As the final seasoning you have to prepare the tarka - heat the oil in the smallest pan or pot you have over medium heat. Once it’s hot add the mustard seeds and red chilli. Once the mustard seeds start to pop add the curry leaves and fry them for a few seconds. Immediately pour the oil and spices over the yogurt and aubergines. Sprinkle withe chopped tomatoe and serve with rice, flat bread or just as it is.

Notes

A tarka is a small amount of hot oil which gets infused with spices and poured over the final dish. It’s a very simple, yet effective technique and you only have to be careful to work quick and don’t let the spices burn.

Filed Under: Salty things

Sun-dried Green Mango Pickle

18/06/2018

In our backyard grows a big mango tree, which bears fruits every couple of years. As we are competing with a gang of  notorious monkeys I’ve never gotten any of its ripe fruits, but you can trick them and pluck your share while they are still young and sour. Mangoes in India (similar to jackfruits) are used in various stages of ripening and can be used in savory dishes or enjoyed as a sweet fruit. There are many uses for unripe mangoes – they get dried and grind to a powder (amchur powder), turned into a tangy summer drink (aam panna), sprinkled with chili salt  as a snack or sun-dried and preserved in oil and spices.

preserved green mangoes

after 1 week

I guess most of my readers don’t have a mango tree in their backyard and won’t need a recipe for pickled green mangoes and even in India, where mangoes are abundant, nowadays less people preserve mangoes themselves as a huge variety of commercial pickles and chutneys are available. I was also not particularly interested in cutting and drying kilos of mangoes and if it weren’t for our gardener I would have never attempted this project. He basically forced me into it with first dropping off sacks full of green mangoes at our house, than bringing his wife Devi to show me how to do it and finally uncovering a glass full of preserved mangoes from last years harvest. After trying a spoonful of the pickle my husband and me were very impressed – the mangoes were still a bit acidic but tasted incredible savory with a pleasant meaty texture. It seemed magical how the sour fruits had turned into these little umami flavor bombs and I was now very willing to spend my entire weekend with cutting and drying of mangoes.

My husband remembered that his grandmother used to preserve mangoes that way, but in the generation of his parents already many traditional recipes were not used anymore. Since his childhood he hadn’t eaten anything comparable and got really excited about the flavor of the homemade pickle. The preserved mangoes made me wonder one more time how many recipes and how much flavor already got lost through the industrialization of our food ?

pickled green mangoes

after 1 year

The family of our gardener still makes their own pickles as they are poor and preserving mangoes means a cheap way to enhance their diet and stock up their supplies. A few pieces of preserved mangoes, with rotis (flatbread) and sliced onions can be a simple but satisfying meal.

If you don’t have a mango tree in your backyard you’ll maybe still be thinking that the recipe is pretty useless to you, but you can also preserve other vegetables in a similar way and I’ll update about that later. Till then I hope I maybe could inspire someone to see what’s ripe wherever you live and ask some grandmother for a recipe for how to preserve it.

Print

Sun-dried Green Mango Pickle

You will find 2 variations of the spice mixture, please choose one, both are equally delicious. As every family in India has their own recipe there are probably a million more ways to make it. These are the 2 recipes I learned from Devi, the wonderful wife of our gardener Jadav.

Ingredients

Mangoes

  • 2,5 kilo young, green mangoes
  • 2 teaspoons salt 
  • 1 teaspoon turmeric powder

Spice mixture 1

  • 30 gram fennel seeds 
  • 40 gram fenugreek seeds
  • 20 gram ajwain seeds
  • 12 cloves
  • 14 gram turmeric powder
  • 3 gram chili powder
  • 40 gram salt
  • 120 ml mustard oil

Spice mixture 2

  • 15 gram fenugreek seeds
  • 15 gram fennel seeds
  • 5 gram ajwain seeds
  • 20 gram coriander powder
  • 8 gram turmeric powder
  • 7 gram chili powder
  • 12 gram garam masala powder
  • 40 gram salt
  • 120 ml mustard oil

You will need an additional 1/2 liter mustard oil or so. The amount will depend on the size of the jar and how tight you pack the mangoes in it.

Instructions

Wash the mangoes with skin thoroughly and let them dry completely. Then half them completely (the seed of the young mangoes is still soft so you can cut through them completely), cut in quarters. Remove the inner part of the seed (this is the part which will fall out easily), the skin of the seed which is attached to the flesh of the mango should stay.

Rub the mangoes evenly with the salt and turmeric powder and spread them on a sheet to let them dry in the sun. (I did let them dry for 1, 5 days in the sun, in the night I did bring them back in). You could also dry them in the oven or a dehydrator (50 - 60 degrees). They don't have to be completely dry, but most of the moisture should have evaporated and the skins start to turn greyish. Drying helps to preserve them for longer. You can skip this step if you plan to eat the pickle relatively fresh.

Choose which spice mix you wanna use and measure the spices accordingly and mix them. Warm the mustard oil slightly, pour over the spices and mix everything. Once the mixture has cooled down distribute it evenly over the mango pieces. With clean hands or a big spoon try to rub in the spices as even as possible till all mangoes are covered with the paste.

Sterilize a big glass jar with boiling water and let it dry completely. Fill in the mangoes and cover the jar with a piece of cloth and a rubber band. Keep the jar in the full sun for another 2 days. This helps to "cook" the pickle and let the mangoes absorb the flavor of the spices fully. A few hours in a slightly heated oven should do the same (50 - 60 degrees).

Once all this is done fill up the glass jar with some mustard oil, so that the mangoes are fully dispensed in it (warm and cool down the mustard oil, before pouring). Now you can close the glasses with the original lid of the jar and keep it at a dark place to ripen further.

You can already eat the mangoes after a week, but I think they are even better after a longer resting phase.

Notes

Work as clean as possible (wash your hands properly, use clean utensils, etc) to ensure a long storage life.

The highly aromatic oil in which the mangoes are preserved can be used later for cooking, salads or drizzling over rice or steamed vegetables to aromatize them.

Filed Under: Salty things, Spices

Maa’s sunroasted Garam Masala

10/05/2018

My parents-in-law live in a sun flooded house in a cosy small town close to Kolkata. Whenever we go and visit them my mother-in-law makes a huge effort to feed us all kind of delicacies. There are local vegetables, duck eggs, small and big fishes and of course everybody’s favourite dish – chingri malai curry (prawns in coconut). The days pass with good food, visits to our relatives, short excursions to town and long afternoon naps. From time to time I get out my notebook to write down a recipe or note an idea. One of the easiest but most essential recipes I learned from Maa is the one for her garam masala.

garam masalaGaram masala is a spice blend widely used in India but it’s preparation varies very much from state to state, but in contrast to other spices mixes it is mainly used as a finishing spice at the end of cooking time. In Bengali cooking, spices are used more sparingly and the typical Bengali garam masala consists of cinnamon, cardamom and cloves. Maa only uses cinnamon and cardamon and instead of roasting the spices in the pan she dries them in the sun.

In India the sun plays an important role to prepare certain ingredients – in mountain regions like Kashmir vegetables and fruits are dried to preserve them for the harsh winter months. Achaars are traditionally fermented in the sun and papadums dried on rooftops. Often it’s said that the sun gives the dishes a special flavour and the romantic in me willingly believes that the soaked up sun rays will shine through the food and enhance every dish.

Ma’s garam masala is sweet & aromatic and a very universal spice mix. It does not only fit well with bengali dishes, it also adds an exotic flavour to roasted vegetables, dals and rice dishes. 1/4 to 1/2 teaspoon added at the end of the cooking process or sprinkled over the dish will drastically improve many dishes. And don’t worry if you live somewhere cold or it’s raining non-stop, you can of course also roast the spices in a pan.

You will need a little mixer, coffee grinder or mortar and pestle for this recipe.

Print

Sun roasted Garam Masala

A quickly made garam masala which goes well with roasted vegetables, dals and rice dishes.

Ingredients

  • 25 grams cinnamon bark (cassia)
  • 20 gram green cardamon pods

Instructions

In the sun:

On a hot summer day lay the spices for a few hours into direct sunlight. After they have dried you can break the cinnamon bark into smaller pieces and grind the whole spices in a small mixer or coffee grinder to a fine powder. Give them through a sieve to get rid of leftover pieces of the cardamon pods.

In case you grind the spices with mortar and pestle (it seems like a lot of work, but is a lot of fun) you should remove the seeds from the cardamon pods and only used the seeds as it is difficult to powder the pods.

Store the spice mix in a dark airtight container it will stay fresh for several weeks.

Roasting in a pan:

Heat up a pan on medium heat and once it's hot add the spices. Roast them, while stirring constantly, till they smell aromatic. This will take 3-4 minutes. Then continue as described above

Notes

In India cassia cinnamon is used for cooking and thats what you need for this recipe. You will get it in any asian store, you can easily recognize the rough bark pieces which are not rolled up like the cinnamon generally used in western countries.


Filed Under: Salty things, Spices

Potatoes & Spinach with Coriander Lemon Chutney

24/04/2018

Many years ago, when I was studying photography and not yet living in India but traveling there regularly, I spent some time in a tiny village in Madhya Pradesh. I had met a group of Naga Sadhus at a small Kumbh Mela and they had invited me to their ashram. I was not really sure what to expect, but the nosy photography student in me wouldn’t want to miss the chance.

The ashram was a little temple with an adjacent house, a pond and a few fields. The sadhus spent most of their day sitting around, bathing in the pond or smoking marihuana. Only from time to time things got interrupted by some religious ceremonies or a villager came with some request. But the ashram was always spotless clean and the sadhus were almost never sleeping. Whenever I went to pee in the night they would still sit at their spot.

When it was time for lunch they would head to the fields and see what was ready to harvest. One of the most common lunches at that time was little potatoes with spinach and a fresh coriander lemon chutney. It was a very simple meal with only a few spices, but it nevertheless took its own time to be ready – the vegetables had to be harvested and cleaned, the small potatoes peeled meticulously and the chutney hand ground on a grindstone. But the long wait was all worth it – only on a few other occasions in my life did I eat such fresh, simple and good food!

I’ve recreated this dish now after many years and although the atmosphere is missing a bit – the crispy potatoes, lightly spiced spinach and fresh coriander lemon chutney of the sadhus are a fantastic meal no matter where you live!

Indisches Dorf Essen mit Koriander Zitronen Chutney
Print

Potatoes & Spinach with Coriander Lemon Chutney

Enough for 2 people

Ingredients

Potatoes

  • 500 gram potatoes (ideally small ones)
  • 1 teaspoon turmeric powder 
  • 3 tablespoons ghee or oil

Spinach

  • 500 gram fresh spinach
  • 1/2 teaspoon black mustard seeds 
  • 1 tablespoon ghee or oil

Coriander lemon chutney

  • 1 bunch fresh coriander
  • juice from 1/2 lemon

For serving

  • a bit jogurth
  • some jaggery & 2 green chillies (optional)

Instructions

Potatoes

Boil the potatoes in a pot with generously salted water. Drain the water, let the potatoes cool a bit and peel them. Rub them with the turmeric powder and add the ghee or oil to a pan and heat on high heat. Fry the potatoes till they are nicely crunchy.

Coriander Lemon Chutney

Clean he coriander and roughly chop it. Puree it together with the lemon juice in blender. If the mixture is to dry add a bit more lemon juice. Add salt per taste.

Spinach

Clean and wash the spinach and remove any hard stems. Heat a pan on medium heat and add the ghee or oil. Once the ghee is hot add the mustard seeds and stir shortly till they pop. Then add the spinach and cook for a few minutes till it's soft and majority of the water has evaporated. Add salt per taste.

Serve everything together with a bowl of jogurth. You can also add a piece of jaggery and a green chilli to nibble on during the meal.


Filed Under: Salty things

Turmeric Garlic Broth

19/04/2018

As a child one of my favorite dishes was a simple broth with noodles. Already very early on I was able to cook it all by myself, standing on a little chair I mixed stock powder with hot water, boiled some noodles in it and after a few minutes I was in a salty broth heaven.

Nowadays I don’t like stock powders that much anymore, but I still love a good broth and have tried a lot of recipes, which promised to turn a pot of hot water into broth heaven. But as I like my broth clear or only with little add ons I find ordinary vegetable broths often a bit boring and they also take ages to cook (and having some bones or a soup chicken at home takes quite some planning).

A while ago I read a book by David Tanis and he mentions a provencal garlic soup which only needs 20 cloves of garlic and hardly anything else. After trying it out I knew I had found the holy grail of vegetable broths. The garlic loses its penetrant smell while cooking and turns he water into a savory broth which is comparable to a long boiled chicken broth. And it only takes 20 minutes with ingredients I always have at home!

It also made me think that many indian dishes start with the same procedure – at the beginning of the cooking process a good measure of ginger-garlic paste is fried together with the spices and then cooked for some time to give the dishes their particular savouriness.

My turmeric garlic broth recipe is a mix between Tanis recipe and the beginning of an Indian curry and uses also turmeric and ginger, which make the soup not only a bit more peppery but also at least as wholesome as a good chicken broth. My 2 year old son loves it by the way.

kurkuma knoblauchbrühe gemüsebrühe
Print

Turmeric Garlic Broth

A savoury vegeterian broth ready in 20 minutes!

Ingredients

  • 20 garlic cloves 
  • 2 tablespoon olive oil
  • 1 piece of ginger (5 cm)
  • 1 teaspoon turmeric powder
  • 3 black peppercorns
  • 1250 ml water (5 cups)
  • salt, as per taste

For serving:

  • herbs
  • noodles
  • vegetables
  • poached egg

Instructions

Give the garlic cloves in a pot or bowl, put some kind of lid or plate on top and shake strongly for 30 seconds. This helps to loosen the skin and makes peeling much easier. Peel the cloves roughly and mash them a bit with a mortar, bottom of a pot or anything else heavy.

Clean the ginger and grate it (it's not necessary to peel it).

Heat the olive oil over medium heat, add the garlic and fry it lightly, it should not take on any colour (2-3 min) Add the ginger, turmeric and peppercorns and fry for another minute.

Add the water and 1 teaspoon of salt, close with a lid and let it simmer for about 20 minutes.

Once ready give everything through a fine sieve while pressing on the garlic, so that all liquid releases. Add salt per taste (don't skimp on the salt, a good broth is always a bit salty). Serve with a lot of fresh herbs (I like coriander), noodles, vegetables, egg or whatever you feel like.

Notes

You should use good quality, fresh garlic for getting maximum flavour.

Filed Under: Salty things, Spices

Baked Kohlrabi Schnitzel with Sourcream Cucumbers

27/03/2018

My grandmother often told the story of  her first Christmas as a wife and the celeriac schnitzel she cooked that evening for my grandfather and her father-in-law. The vegetable schnitzel were a big hit and both men ate with great pleasure. The excitement about the meal wasn’t because the two were vegetarians, but because it was in the middle of world war II and my grandmother had managed to prepare a fantastic meal with whatever little was available. They suddenly had a resourceful and creative cook in the house, which could make something out of almost nothing. As a child I dismissed the war and naively imagined their first Christmas as a cosy be together, candles all around, my grandmother with red cheeks and my grandfather playing Christmas songs on the violin. It probably wasn’t like that but the celeriac schnitzel became part of our family history and one of my favourite foods.

Celeriac schnitzel are actually not an unknown dish in traditional Austrian and Bavarian cooking and you can already find recipes for them in classic cookbooks like “Das Bayrische Kochbuch” and “Das Böhmische Kochbuch” (two absolute classics, unfortunately only available in german).

As we do not get celeriac root in India I make a version with kohlrabi, which tastes equally good and bake them in the oven instead of frying, which is a bit quicker to make. You can eat them with salad, vegetables or potatoes, but in my opinion they are best with a simple, creamy cucumber salad.

kohlrabi schnitzel gebacken
Print

Baked Kohlrabi Schnitzel

For 2 very hungry or 4 normal eaters.

Ingredients

For the Schnitzel:

  • 1 - 2 Kohlrabi (depending on size)
  • 100 gram flour
  • 2 eggs 
  • 100 gram finely grated parmesan
  • 75 gram breadcrumbs (I use panko)
  • 2 tablespoons olive oil
  • 1 teaspoon salt
  • 1/2 teaspoon freshly ground black pepper

For the creamy cucumbers:

  • 1 large cucumber
  • 1/2 cup sour cream (or a mixture of jogurth and cream)
  • 1 clove garlic, smashed
  • 1 teaspoons mild vinegar
  • 1 teaspoon salt
  • a bit finely cut dill (optional)
  • a bit of olive oil
  • freshly ground black pepper

Instructions

Schnitzel

Peel the kohlrabi and cut them into 0,5 cm thick rounds. Bring a medium sized pot with generously salted water to a boil and add the kohlrabi. Cook the kohlrabi medium soft (about 5 minutes). Take them out of the water and drain them in a sieve.

Preheat the oven to 170 degrees (335 fahrenheit).

Mix the flour with the salt and pepper and fill it in a flat plate which fits the size of the kohlrabi slices. Mix the eggs together and fill into another plate. In a third plate you mix the parmesan, breadcrumbs and olive oil evenly.

Then bread the kohlrabi slices - first turn around the slices in the flour, shake off excess flour and move on to the eggs. Gently pull them through the eggs and finally press them into the breadcrumbs. The breading has a tendency to slip off again and you'll have to be a bit careful not to push it off with your fingers again. Repeat with a kohlrabi slices and lay them on a tray. Once all are breaded bake them in the oven for about 15 minutes till they are nicely golden brown. Take them out and serve immediately.

Creamy cucumbers

Mix the sourcream with the vinegar, salt, garlic and dill if using. Cut the cucumber in half and removed the seeds. Slice the cucumber finely with a mandoline or cut of long locks with a vegetable peeler. Mix the cucumber with the sourcream and granish with a bit of black pepper and a few drops of olive oil. Serve immediately otherwise the cucumber will get soggy.


Filed Under: Salty things

Spicy Easter – Egg Curry

20/03/2018

I really love Easter and all it’s pastel shades, fluffy lambs, long brunches and searching for nests in the fresh grass. But it’s not going to happen here. The sun is brutal already, my husband doesn’t get the connection between crucification and happy bunnies and my son could step on a snake while searching for his easter nest.

So no easter this year, but at least we all like eggs, preferably in a thick, spicy sauce. So this Easter we will cuddle up with some spicy eggs, cook us a pot of rice and be happy nevertheless. In case you need a really good recipe for using up all those easter eggs or you just want to escape the chocolate coma, here it is:

eier curry
Print

Egg Curry

Best served with some rice or roti. With a bit of vegetables or salad on the side it makes for a perfect meal. Enough for 4 people.

Ingredients

  • 4 eggs, boiled & peeled
  • 1 onion
  • 3 garlic cloves
  • 1 piece ginger (5 cm)
  • 2 tomatos
  • 2 tablespoons oil (I use mustard oil, but any will do) 
  • 1 teaspoon sugar
  • 1 teaspoons salt
  • 3 green cardamom, slightly opened 
  • 1 black cardamom, slightly crushed
  • 2 cloves
  • 1 piece cinammon bark (3 cm)
  • 1 teaspoon cumin powder
  • 1teaspoon coriander powder
  • 1 teaspoon chilli powder (or per taste)
  • 1/2 teaspoon turmeric

Instructions

Cut the onion and tomatoes in small cubes. Peel the garlic and ginger and either make a paste with mortar and pestle or cut them very finely (you can also grate the ginger on a box grater).

In einer Pfanne bei mittlerer Hitez das Öl heiß werden lassen und die ganzen Gewürze (Zimtstange, Kardamomkapseln, Nelken) dazugeben. Unter Rühren solange rösten bis die Gewürze aromatisch duften (ca. 2 Minuten, dies dient dazu die Geschmacksstoffe im Öl zu lösen).

Heat the oil in a pan and fry the whole spices (cardamom, cinammon, cloves) till they smell aromatic (about 2 minutes, this will infuse the oil with the aroma of the spices).

Reduce the heat a bit, add the onion and sugar and brown the onion nicely for about 5 minutes. The onion should caramelize but not get crispy, so keep stirring. Add the ginger and garlic and fry for another 2minutes.

Now add the spice powders (cumin, coriander, turmeric and chilli), chopped tomatoes, salt and 1 cup of water. Cook everything till the majority of the water has evaporated. Add the peeled eggs, stir gently till they are covered with the sauce and cook for another 2 minutes. If the gravy gets too dry you can add a bit more of water.


Filed Under: Salty things

« Previous Page
Next Page »

Primary Sidebar

  • Bloglovin
  • Facebook
  • Instagram
  • Pinterest
tapioca mais fritter
Mukhwas, digestive spice and seed mix

Footer

  • Email
  • Facebook
  • Instagram
  • Pinterest

Copyright© 2025 · Brunch Pro Theme by Feast Design Co.

This site uses cookies: Find out more.